MySQL初期設定~テスト用データベース作成
今回はいつぞや入れたMySQLをいじってみたのでその備忘録に。
MySQL設定
CentOSのコンソール上で以下を入力。
$mysql_secure_installation
すると対話式に設定が始まるので各設定に…。
NOTE: RUNNING ALL PARTS OF THIS SCRIPT IS RECOMMENDED FOR ALL MySQL
      SERVERS IN PRODUCTION USE!  PLEASE READ EACH STEP CAREFULLY!

In order to log into MySQL to secure it, we'll need the current
password for the root user.  If you've just installed MySQL, and
you haven't set the root password yet, the password will be blank,
so you should just press enter here.

Enter current password for root (enter for none):   <----- 起動したてでrootパスワードが設定されていないので、そのままEnter
OK, successfully used password, moving on...

Setting the root password ensures that nobody can log into the MySQL
root user without the proper authorisation.

Set root password? [Y/n] Y  <----- Rootパスワードを設定するので「Y」
New password:       <----- パスワードを設定
Re-enter new password:  <----- パスワードを再入力
Password updated successfully!
Reloading privilege tables..
 ... Success!


By default, a MySQL installation has an anonymous user, allowing anyone
to log into MySQL without having to have a user account created for
them.  This is intended only for testing, and to make the installation
go a bit smoother.  You should remove them before moving into a
production environment.

Remove anonymous users? [Y/n] Y     <----- 匿名ユーザーを排除するため「Y」
 ... Success!

Normally, root should only be allowed to connect from 'localhost'.  This
ensures that someone cannot guess at the root password from the network.

Disallow root login remotely? [Y/n] Y   <----- RootでMySQLにリモートログインするのはセキュリティ的に危ないので「Y」
 ... Success!

By default, MySQL comes with a database named 'test' that anyone can
access.  This is also intended only for testing, and should be removed
before moving into a production environment.

Remove test database and access to it? [Y/n] Y  <----- testデータベースは不要のため「Y」
 - Dropping test database...
 ... Success!
 - Removing privileges on test database...
 ... Success!

Reloading the privilege tables will ensure that all changes made so far
will take effect immediately.

Reload privilege tables now? [Y/n] Y    <----- 上記設定による権限の変更等を即時反映したいので「Y」
 ... Success!

Cleaning up...


All done!  If you've completed all of the above steps, your MySQL
installation should now be secure.

Thanks for using MySQL!設定が終わったところで以下のコマンドでMySQLにログイン。
$mysql -u root -p
設定したパスワードを入力すると、MySQLのコンソールに。
早速、テスト用データベースを作ってみました。
テスト用DB作成
Authorの資源のなかで、そこそこ物量のあるiTunesライブラリの情報をデータベースに登録しようと思います。
以下のコマンドでテスト用データベース・テーブルを作成。
mysql>create database test_itunes; ←「test_itunes」というデータベースを作成。
データベース内のテーブルはカラムを設定しなければならないので、以下のカラムを設定するようにしました。
列1:No.(連番登録)
列2:アーティスト名(Artists)
列3:アルバムタイトル(Album_title)
列4:ディスク枚数(Disks)
列5:リリース年(Release_date)
mysql>create table test_itunes.music ( ←「test_itunes」データベースに「music」テーブルを作成
    ->No int auto_increment,      ←列1に「No」カラムを数値型(int)で自動採番(auto_increment)登録
    ->Artists varchar(40),       ←列2に「Artists」カラムを半角40文字までのサイズ可変文字列型(varchar(40))で登録
    ->Album_title varchar(50),     ←列3に「Album_title」カラムを半角50文字までのサイズ可変文字列型(varchar(50))で登録
    ->Disks int,            ←列4に「Disks」カラムを数値型(int)で登録
    ->Release_date date,        ←列5に「Release_date」カラムを日付型(date)で登録
    ->index(No));            ←列1の「No」カラムにインデックスを付加(※auto_increment時に必須)
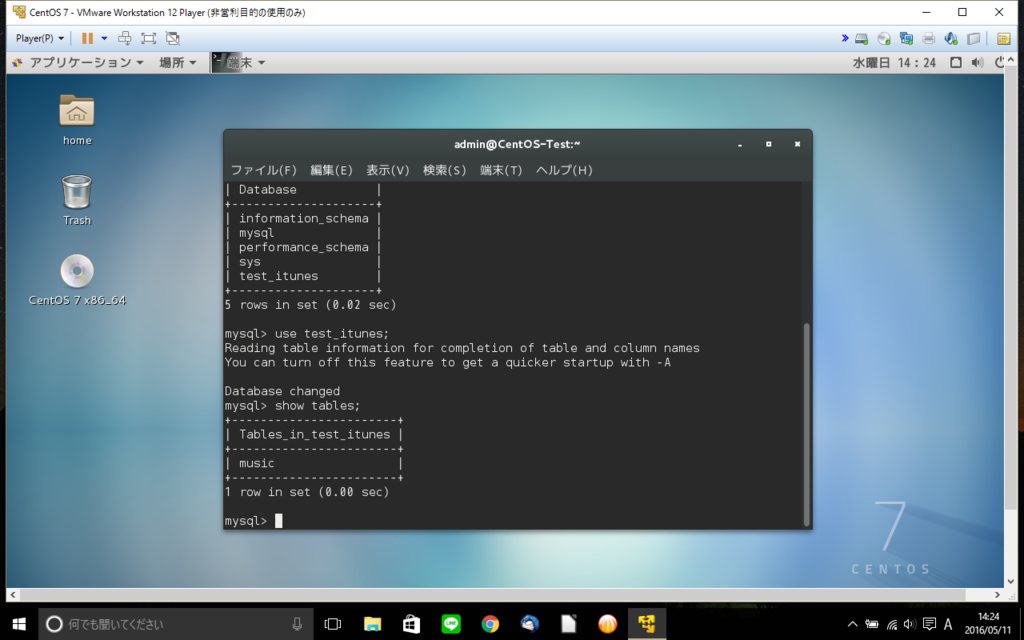
作成ができたかどうか確認するため、以下のコマンドを入力。
mysql>use test_itunes;
mysql>show tables;

テーブルへのレコード(データ)登録
作成したtest_itunesデータベースのmusicテーブルにレコード(データ)を入れていきました。
mysql>insert into テーブル名 (カラム1,カラム2,カラム3,…) values (カラム1データ,カラム2データ,カラム3データ,…);
という風に入力を行っていきました。
入力例が以下。
mysql>insert into music (artists,album_title,disks) ←「music」テーブルにアーティスト名:Arctic Monkeys、アルバムタイトル:AM、ディスク枚数[1]を登録
    ->values ('Arctic Monkeys','AM',1);
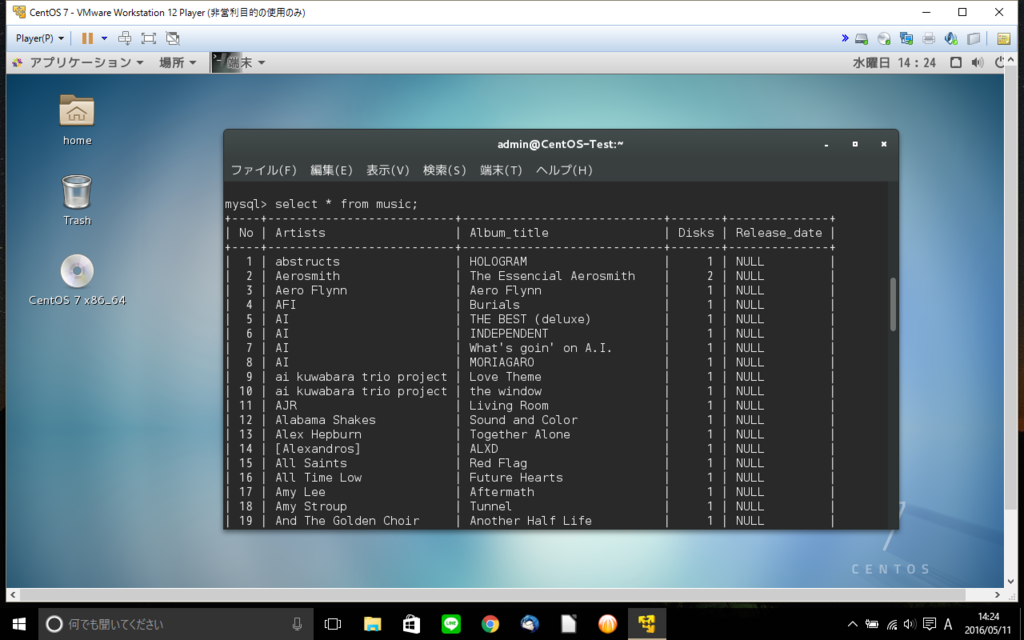
入力状況を確認するために以下を入力。
mysql>select * from music;
すると確かにテーブル内に情報が登録されているのが確認できました。

iTunesライブラリの物量が多くてまだ全部の登録が終わってませんが、とりあえずここまで。